As a professional chef with so many years of experience, I’ve developed hundreds of signature sauces and dips for my family. But my all-time favorite has to be this light and flavorful cava garlic sauce.
Made with just a handful of simple ingredients like garlic, olive oil, and cava wine, it packs a seriously tasty punch. The sparkling effervescence of the cava mingles with the mellow roasted garlic to create a sauce that is simply addictive.
I love to serve it alongside grilled meats, fish, and vegetables. But it’s also fantastic as a dip for crusty bread. No matter how you use it, this cava garlic sauce always disappears fast!
I’m excited to share my recipe for this crowd-pleasing sauce so you can enjoy its magic in your own home kitchen.
Why I Love This Cava Garlic Sauce Recipe?
There are so many reasons why I’m obsessed with this cava garlic sauce.
- First, the method is incredibly easy – simply roast garlic cloves until they’re softened and caramelized, then puree with cava, olive oil, lemon, and a touch of thyme.
- The prep time is minimal and it comes together in just 10 minutes. I also love how versatile it is.
- The sauce pairs nicely with everything from grilled chicken and steak to roasted veggies and fish.
- The sparkling effervescence from the cava wine gives it a lightness and vibrancy, while the garlic adds a wonderfully aromatic backbone. And a drizzle of good olive oil brings in some fruitiness.
- Finally, the flavor is just incredible! It hits all the right notes – garlicky without being overpowering, bright, and balanced.

Ingredients
Here are the simple ingredients you’ll need to make this fabulous cava garlic sauce at home:
- 1 whole head of garlic: Make sure to use fresh, firm bulbs of garlic. Roast them in the oven whole.
- 1/4 cup extra virgin olive oil: Use a nice fruity olive oil to add flavor.
- 1/4 cup cava wine: Cava is a Spanish sparkling wine. Look for a brut style.
- 2 tablespoons freshly squeezed lemon juice: Lemon brightens the sauce.
- 2 teaspoons chopped fresh thyme leaves: Thyme complements the garlic beautifully.
- 1/4 teaspoon kosher salt and black pepper: Season to taste.
- Pinch of red pepper flakes (optional): Adds a little heat.
That’s it! With just a few basic ingredients, you’ll have restaurant-quality, garlicky goodness. Play around with different cava wines to find your favorite.
Kitchen Appliances Needed
To make this cava garlic sauce, you just need a few basic kitchen tools:
- Oven: To roast the garlic cloves until caramelized and soft. This builds deep flavor.
- Food processor or blender: To puree the roasted garlic into a smooth sauce consistency. A powerful high-speed blender works best.
- Measuring cups and spoons: To accurately measure out the wine, olive oil, lemon juice and seasonings.
- Mixing bowl: If mixing any ingredients by hand.
- Rubber spatula: Helpful for scraping down the sides of the blender or food processor bowl while pureeing.
- Fine mesh strainer: To strain out any fibrous pieces of garlic or thyme after blending.
That’s it – you don’t need any special equipment beyond some basic kitchen appliances to whip up this sauce.
Step-by-Step Instructions
Now let’s get cooking with my easy method for making the most insanely delicious cava garlic sauce!
Step 1: Preheat the Oven
First, preheat your oven to 400°F. Take one whole, fresh head of garlic and slice off the very top just to expose the tops of the cloves. Place the head of garlic on a sheet of aluminum foil. Drizzle about 1 teaspoon of olive oil over the exposed cloves and wrap everything up tightly in the foil to seal.
Step 2: Prep the Garlic
Roast the garlic in the oven for 40-50 minutes, until the cloves are completely soft when pierced with a knife. The garlic should be caramelized and golden brown. Allow the roasted garlic to cool slightly.
Step 3: Roast the Garlic
While the garlic is roasting, gather the rest of your ingredients – 1/4 cup extra virgin olive oil, 1/4 cup cava wine, 2 tablespoons freshly squeezed lemon juice, 2 teaspoons thyme leaves, and seasonings.
Step 4: Gather Your Squad
Once roasted and slightly cooled, unwrap the garlic head and squeeze out the softened cloves into a food processor or blender bowl. Add the olive oil, cava wine, lemon juice, thyme, 1/4 teaspoon salt, and a pinch of red pepper flakes (if using).
Step 5: Unleash the Garlic Goodness
Puree the ingredients together on high speed until you have a very smooth, emulsified sauce. If needed, stop and scrape down the sides of the bowl with a rubber spatula. The pureeing process should take 1-2 minutes.
Step 6: Emulsify Like a Pro
Taste the blended cava garlic sauce and season to your preferences with additional salt, pepper, or lemon juice if desired. For a smoother consistency, pour through a fine mesh strainer.
Step 7: Taste and Tweak
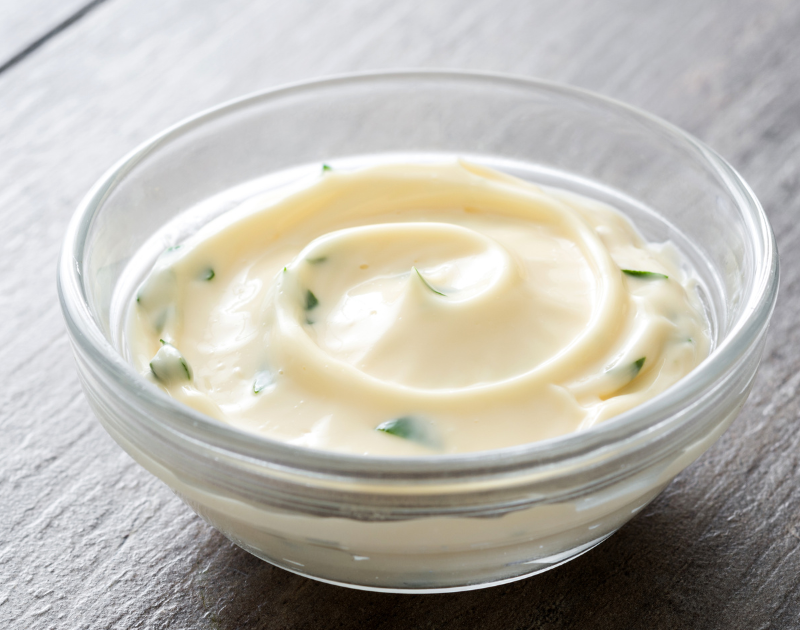
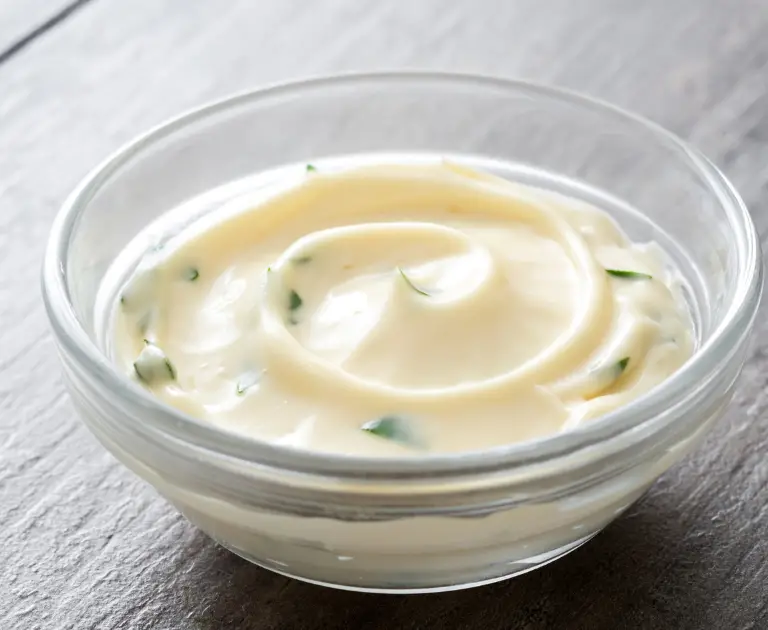
Transfer the finished sauce to a serving bowl or storage container. This makes about 3/4 cup of sauce. It can be used immediately while still warm, or refrigerated for up to 5 days until ready to use.
Step 8: Serve or Save
My favorite way to enjoy this sauce is drizzled over grilled meats like steak, chicken or shrimp. It’s also fantastic brushed on fish fillets before broiling or grilling. For a delicious appetizer, serve it alongside crusty bread for dipping. No matter how you use it, get ready for incredible flavor!
Special Notes
Here are a few special tips for making this cava garlic sauce perfectly:
- Make sure to use high quality extra virgin olive oil for the fruity flavor it lends.
- Roast the garlic slowly so the cloves become completely soft and caramelized. This builds maximum richness.
- Let the roasted garlic cool for 5-10 minutes before pureeing so you don’t heat the olive oil too much.
- Use a good brut style cava wine. It should be dry and crisp.
- Add the cava to the blender last and puree briefly for lightness.
- Season with additional salt, lemon, and pepper to brighten the flavors.
- Strain for the smoothest, silkiest texture.
Recipe Variations
This versatile sauce can be tweaked in so many delicious ways:
- Add 1-2 chopped anchovy fillets for extra umami savoriness.
- Use champagne instead of cava for a French twist.
- Swap the thyme for rosemary or oregano.
- For heat, add 1 minced jalapeño or serrano chili.
- Play with different oils like walnut or hazelnut oil.
- Stir in some chopped sun-dried tomatoes for depth.
- For a creamy sauce, blend in 2 tablespoons softened cream cheese.
- Add a dash of hot sauce or cayenne pepper for a spicy kick.
The possibilities are endless for customizing this garlic sauce!
Serving Suggestions
This bright cava garlic sauce shines when served alongside or drizzled over:
- Grilled meats like steak, chicken, pork chops, lamb chops
- Grilled or roasted fish like salmon, halibut, cod
- Grilled shrimp, scallops, mussels
- Roasted vegetables like potatoes, broccoli, cauliflower, carrots
- Baked or grilled eggplant
- Hard cheeses for dipping like manchego or parmesan
- Crusty bread for dipping
- Frittatas, shakshuka, omelets
- Pasta dishes
- Hummus, baba ganoush
- Flatbreads, bruschetta
The possibilities are endless! It also makes a great marinade or salad dressing.
Storing and Reheating Leftovers
This sauce holds up nicely for leftovers:
- Let the sauce cool fully, then transfer to an airtight container.
- It will keep refrigerated for 4-5 days. The flavors may deepen over time.
- When ready to reuse, let the sauce come to room temperature first if it’s too thick.
- To thin it, stir in a splash of olive oil, lemon juice, or water.
- To reheat, place the sauce in a small saucepan over medium-low heat until warmed through, 1-2 minutes.
- Alternatively, microwave in 15 second intervals just until heated through.
- Avoid boiling or overheating as this may cause the garlic to become bitter.
- Taste and re-season if needed.

Cava Garlic Sauce Recipe
Ingredients
Kitchen Appliances Needed
Instructions
- First, preheat your oven to 400°F. Take one whole, fresh head of garlic and slice off the very top just to expose the tops of the cloves. Place the head of garlic on a sheet of aluminum foil. Drizzle about 1 teaspoon of olive oil over the exposed cloves and wrap everything up tightly in the foil to seal.
- Roast the garlic in the oven for 40-50 minutes, until the cloves are completely soft when pierced with a knife. The garlic should be caramelized and golden brown. Allow the roasted garlic to cool slightly.
- While the garlic is roasting, gather the rest of your ingredients – 1/4 cup extra virgin olive oil, 1/4 cup cava wine, 2 tablespoons freshly squeezed lemon juice, 2 teaspoons thyme leaves, and seasonings.
- Once roasted and slightly cooled, unwrap the garlic head and squeeze out the softened cloves into a food processor or blender bowl. Add the olive oil, cava wine, lemon juice, thyme, 1/4 teaspoon salt, and a pinch of red pepper flakes (if using).
- Puree the ingredients together on high speed until you have a very smooth, emulsified sauce. If needed, stop and scrape down the sides of the bowl with a rubber spatula. The pureeing process should take 1-2 minutes.
- Taste the blended cava garlic sauce and season to your preferences with additional salt, pepper, or lemon juice if desired. For a smoother consistency, pour through a fine mesh strainer.
- Transfer the finished sauce to a serving bowl or storage container. This makes about 3/4 cup of sauce. It can be used immediately while still warm, or refrigerated for up to 5 days until ready to use.
- Transfer your masterpiece to a serving bowl or storage container. You’ve just crafted about 3/4 cup of pure deliciousness. Use it immediately for warm hugs of flavor or refrigerate for up to 5 days until the perfect moment strikes. Enjoy your culinary triumph!
Frequently Asked Questions
Here are answers to some frequently asked questions about this addictively delicious cava garlic sauce:
How long does the roasted garlic need to cook?
The cloves should roast for 40-50 minutes until completely softened and caramelized. They almost turn into a paste when done.
Can I use regular wine instead of cava?
While you can use a dry white wine, the sparkling effervescence from cava makes this sauce extra special.
Can I make the sauce ahead?
Absolutely! Store it refrigerated for 4-5 days and reheat gently before serving.
How spicy is it?
This recipe has just a hint of heat from optional red pepper flakes. Add more or omit for less spice.
Can I double the recipe?
Yes, simply double all the ingredient amounts. You may need to puree it in batches.
Should I peel the garlic cloves before roasting?
No need! The skins will come off easily once roasted.
Conclusion
As you can see, this sparkling cava garlic sauce comes together with minimal effort but delivers maximum flavor. With just a few pantry ingredients like roasted garlic, lemon, thyme and olive oil, it transforms into a bright, versatile sauce that complements anything from grilled meats to roasted veggies.
I love how the effervescence of the cava wine adds a refined Lightness rather than making the sauce heavy. Roasting the garlic is crucial for developing its natural sweetness and rich caramelized notes too.
Whether enjoyed as a marinade, drizzled over dishes or used as a dip, this sauce always elicits rave reviews anytime I serve it.
I hope you’ll give this recipe a try soon and enjoy the delightful alchemy of turning basic ingredients into a restaurant-worthy cava garlic sauce.
Drizzle it over your favorite foods or give it as a gift – either way, it’s sure to become a fast favorite! Let me know how it goes when you make it.